Top Takeaways and Key Concepts
- Build a shelter first to protect yourself from weather and stay warm and dry.
- Insulate your shelter using leaves, pine needles, and layering to retain body heat.
- Locate and purify water using survival straws, boiling, or solar still methods.
- Forage safely by identifying edible plants and supplementing food with fishing or trapping.
- Learn navigation, fire-making, and safety skills to stay prepared and confident outdoors.
Summary of This Article
This article teaches essential outdoor survival skills needed to stay alive and comfortable in the wilderness. It explains how to build and insulate a shelter using natural materials to avoid freezing temperatures. It also covers how to find and purify water using tools like survival straws or solar stills. The article highlights safe foraging techniques, basic fishing and trapping methods for food, and the importance of learning map and compass navigation. Finally, it stresses fire safety, cooking, and preparation, encouraging readers to practice these survival skills regularly to gain confidence and stay prepared during outdoor adventures.
Video Version of this Article
When you think of outdoor survival skills, what comes to mind? Maybe it’s a rugged individual, channeling their inner Bear Grylls while drinking questionable water from a stream. Or perhaps you envision yourself stuck in the woods with nothing but a pocket knife and a vague memory of that one episode of “Survivor.” Honestly, mastering these skills can be fun and downright essential if you ever find yourself lost in the wild or just want to impress your friends around the campfire. Let’s dive into some key outdoor survival skills that could save your bacon—or at least keep you from becoming bear food!
Building a Shelter: Your Home Away from Home
Please Note: This post may contain affiliate links. If you click one of them, we may receive a commission at no extra cost to you. As an Amazon Associate, I earn from qualifying purchases.

First off, let’s talk about shelter. Imagine being out in the wilderness when suddenly it starts pouring rain. You’re not exactly prepared for an impromptu shower (Unless you brought a tent)! Knowing how to build a shelter can make all the difference between feeling cozy and wet like a soggy sandwich.
If you’re feeling brave, you may make different kinds of shelters out of natural materials like branches, leaves, and even snow. The lean-to is a popular choice. It’s essentially two poles leaning against each other with branches on top for support. It’s as easy as making a fort when you were a kid, except this time Mom won’t yell at you to clean up after!
When you build a shelter, insulation is quite important, especially when you camp in the winter. Imagine getting into your sleeping bag and feeling the cold air come in like an unwanted guest. It’s not only uncomfortable; if you’re not ready, it might be really hazardous! So, let’s talk about some good ways to insulate yourself so you can be warm and comfortable as you enjoy the great outdoors.
First of all, leaves are one of the easiest and best materials to use for insulation. They may look weak, but when you stack them up high enough, they make a great barrier against the cold. Think about how trees trap heat with their leaves. Gather a lot of dry leaves and put them on top of your sleeping area in your shelter. This makes a cushion and keeps heat in at the same time. Not only will you be warmer, but you’ll also have a nice place to rest after a hard day of hiking.
Another great choice for insulation is pine needles. These small things are good for more than just making wreaths for the holidays! When you harvest pine needles and put them in your shelter, they keep you warm and comfortable because they are naturally good at insulating. They also smell great! Simply pick up a number of them off the ground around pine trees, making sure they are dry. Then, equally distribute them out around your sleeping space or along the walls of your shelter.
It’s not just what you put inside your shelter that matters; it’s also how you dress. Let’s speak about layering. Wearing more than one layer helps keep heat near to your body. Start with base layers that wick away moisture to keep sweat off your skin (no one likes being wet in the cold). Then, put on layers of fleece or down to keep you warm, and then add a waterproof outer layer to keep out wind and rain.
On cold nights, even the ground below you can take away heat. If you can, build your shelter on high ground instead of directly on cold ground or snow. You can use branches or logs as temporary flooring in your shelter. This will give you more insulation between you and the cold ground below.
Finally, make sure to seal up any holes in your shelter where cold air could come in! Fill in any cracks and crevices with more leaves or debris so that every nook is as snug as a bug in a rug (or at least as tight as it can be!). Believe me, no one likes waking up shivering uncontrollably because they forgot about those stealthy drafts!
If you follow these procedures to properly insulate your shelter, you’ll be comfortable all night long, even if the temperature outside drops like it’s auditioning for “Dancing with the Stars.” So, get ready with these recommendations before you go out into the cold. You’ll be glad you did when you’re warm and sleeping instead of freezing!
Finding Water: The Lifeblood of Survival

Now let’s be honest about one important thing: water. We’d all turn into raisins fairly rapidly without it! So, how do you discover water that you can drink in the wild? First of all, don’t drink straight from streams or ponds unless you’re confident they’re safe (and even then, I wouldn’t advocate it). One trick would be to use a survival straw.
Animals know where to go, therefore a good way to find water is to check for traces of animal tracks leading there. You can also collect rainwater in any container you have or by digging little holes to catch condensation that forms overnight.
If you’re feeling really fancy, why not improve your outdoor survival abilities by making a solar still? It sounds like something you would do for a science fair project, but it’s not as hard as it sounds and can really help you when you need clean water. Imagine this: you’re in the woods, the sun is beating down on you like it’s trying out for the part of “Most Relentless Star,” and you’re thirsty. You don’t have to fight with nature or look for a stream that may or may not be there. You can make your own water supply with only a few simple things and a little creativity.
First, pick a sunny place where you won’t have to worry about pebbles or roots getting in your way. Trust me, digging is lot easier on flat ground! After you’ve chosen a spot, get your trusty shovel (or something that looks like one) and dig a hole that is approximately two feet broad and deep enough to hold the container you’re using. It might be anything that can hold liquid, such an empty water bottle or a metal cup.
Now for the exciting part: putting your container in the hole. Place it directly in the middle so that when we cover everything up later, there will be plenty of room for moisture to leak into it. The goal is to make a space where moisture from the ground will evaporate as the sun shines on it, then condense on the plastic wrap above and drop down into your container. It’s like “set it and forget it” for Mother Nature!
The plastic wrap comes next. If you have any plastic wrap on hand (and let’s be honest, who doesn’t bring rolls of plastic wrap with them on their adventures?), put it over the hole so that it covers everything tightly. Make sure there are no gaps because every little bit counts when you’re trying to catch moisture! Put something substantial in the middle of the wrap to hold it firm and stop the wind from turning your work of art into an inadvertent kite. This may be a rock or even some dirt piled up a little.
And there you go! You now have a solar still that is ready to go. When the sun warms the ground below, whatever moisture that is there will rise up to the nice plastic covering you made. As the temperature changes throughout the day and night, condensation will build up on the bottom of the wrap and then drip down into the container below.
This method doesn’t always provide you gallons of water right away—usually about half a liter a day, depending on the weather—but it’s a great backup plan when you’re in a tight spot. It also seems like magic to watch this happen; it’s like seeing science happen right in front of your eyes!
So, the next time you’re camping or hiking in a distant region where clean drinking water isn’t easy to find, use this solar still method! It’s easy but works well. It’s a terrific way to show off your inventiveness and resourcefulness without having to fight with nature too much (unless we’re talking about those annoying mosquitoes). Who would have thought that drinking enough water could feel so good?
Foraging for Food: Nature’s Grocery Store

Okay, so you have shelter and water. What about food? At first, foraging might seem scary (who wants to eat something that could make them sick?), but once you discover what you can and can’t eat, it gets really fun.
Before you go on an adventure, learn about the plants that grow in your area. You can eat dandelion greens (yes, those annoying weeds) and wild berries like blackberries and blueberries. But always double-check your plant ID because no one wants to end up in the hospital!
If you know how, you might also try fishing or capturing small animals. Imagine this: you’re in the woods, surrounded by the splendor of nature, and your stomach is growling louder than a grizzly with a sore throat. Foraging for berries can be enjoyable (and tasty), but sometimes you need something more filling to satiate your appetite. So why not get into your inner outdoorsman or lady and see what you can catch?
Let’s start by talking about fishing. A lot of individuals find this classic talent to be both calming and fulfilling. You only need some basic fishing gear, such a fishing line, hook, and bait, and a little bit of patience. That’s excellent if you have a rod! Don’t worry if you don’t have one; you can make one out of a strong stick. Simply tie a hook to the end of your line and attach it to the end of the line. If you can dig them up, worms are great bait!
Now we have to wait. Look for a pleasant place near the water where fish like to hang out, like shady nooks beneath trees or places where the current slows down. Then cast your line. While you wait for that bite, look around you! Who knew that survival could come with such nice noises? Enjoy the sounds of birds tweeting or leaves rustling. But don’t forget to watch that bobber! It’s time to go when it goes below the surface!
If you don’t like fishing or want to do something more exciting (and maybe more difficult), trapping small game can be suitable for you, as long as you’re okay with it. You need to know a little bit about how animals act and where they live in order to trap them, but it can be really effective if you do it right. Set traps in places where animals are likely to go, such as pathways or near water sources.
Depending on what you want to catch, you can use different kinds of traps. For example, you can use snares made of paracord or basic box traps constructed of fallen branches and leaves. The most important thing is to know how these animals think, as they aren’t exactly making dinner reservations at a posh restaurant! They prefer to go in certain directions based on how safe and available food is.
But before we get into all this trapping, I want to remind you that this isn’t “Survivor.” You don’t have to worry about looking stupid while trying to catch dinner. (But I’m sure we’d all win trophies for our finest uncomfortable moments.) So don’t feel like you have to eat bugs unless you really have to! In theory, insects full of protein might sound like a fancy dish, but in real life? Let’s just say I’d rather not have legs on my goodies.
If fishing or trapping seems too hard or even gross, you may always fall back on good old-fashioned foraging! Dandelions and clover blooms are examples of wild plants that are easy to find in nature. They give you important nutrients without having to fight with animals.
In the end, whether you’re fishing in lakes, setting traps in forests, or just snacking on nuts you find along the route, it’s all about using those outdoor survival skills that make us feel alive in nature’s playground! Just remember that every meal is an experience in its own right, even if you have to deal with nasty crawlies from time to time!
Navigating Like a Pro: Maps & Compasses

Now that we’ve covered essentials like shelter and food let’s tackle navigation because getting lost is never fun—even if you have snacks! While modern technology has made our lives easier with GPS apps on our phones (thank goodness for Google Maps!), knowing how to navigate using maps and compasses is invaluable when those gadgets fail us.
To start navigating manually, familiarize yourself with reading topographic maps—the kind that show elevation changes—and understand how they relate to physical landmarks around you. A compass will help orient your map correctly; it’s not just there for decoration!
Practice taking bearings before heading out into unfamiliar territory so you’ll feel more confident when relying on traditional methods instead of hoping Siri knows where she’s going! Honestly, as much as I love my smartphone, there’s something about being in the great outdoors that makes me think maybe it wouldn’t hurt to rely on good old-fashioned navigation skills. Let’s face it: when you’re deep in the woods or scaling a mountain, your phone might decide to take a nap just when you need it most—like that friend who mysteriously disappears at parties right when the dance floor opens up.
So, what exactly does “taking bearings” mean? It sounds fancy, but really it’s just a way of determining your direction using a compass and some simple techniques. First off, grab yourself a compass if you don’t have one already. They’re not just for treasure hunters; they can be lifesavers! The basic idea is to align the compass needle with the north marker while keeping an eye on where you want to go—whether it’s that picturesque waterfall you read about or simply back to your cozy campsite.
Now, let’s talk about how this works practically. Before setting foot outside, find a spot (preferably somewhere comfortable like your living room couch) and practice reading your compass. Hold it flat in your palm and watch as the needle spins around until it settles pointing north. Pretty cool, right? From there, figure out which direction corresponds with your destination. If you’re aiming for that waterfall we mentioned earlier and it’s east of where you are now, then you’ll want to turn until the compass needle aligns with the east marker.
Once you’ve got this down pat indoors (bonus points if you do it while sipping hot cocoa), take it outside! Find familiar landmarks—maybe a tree that looks like it has seen better days or a rock formation that resembles an ancient dinosaur—and use them as reference points while practicing taking bearings on actual trails. This will help solidify those skills so they become second nature.
Practicing these skills before venturing into unknown areas not only boosts confidence but also enhances your overall experience in nature. Instead of wandering aimlessly while staring at Google Maps (which may lead you down an unexpected path—or worse—a dead end), you’ll feel empowered knowing exactly how to navigate using natural signs and tools available to us since forever!
And speaking of navigating without tech—don’t forget about learning how to read maps too! A physical map can be incredibly useful when you’re far from civilization because they don’t run out of battery life or require Wi-Fi connections. Learning how to interpret symbols and scales on maps can open up new worlds for exploration—not to mention give off serious adventurer vibes!
So next time you’re planning an outdoor adventure, set aside some time beforehand for navigation practice. It might seem like extra work initially (and honestly could involve some head-scratching moments), but trust me—it pays off big time! You’ll not only avoid potential detours into uncharted territories but also develop skills that’ll make any journey feel exciting rather than intimidating.
Whether it’s mastering compasses or brushing up on map-reading prowess—the more prepared we are before heading out into unfamiliar territory, the more enjoyable our experiences will be! And who knows? Maybe someday soon you’ll find yourself confidently leading friends through breathtaking landscapes instead of waiting for Siri’s questionable guidance!
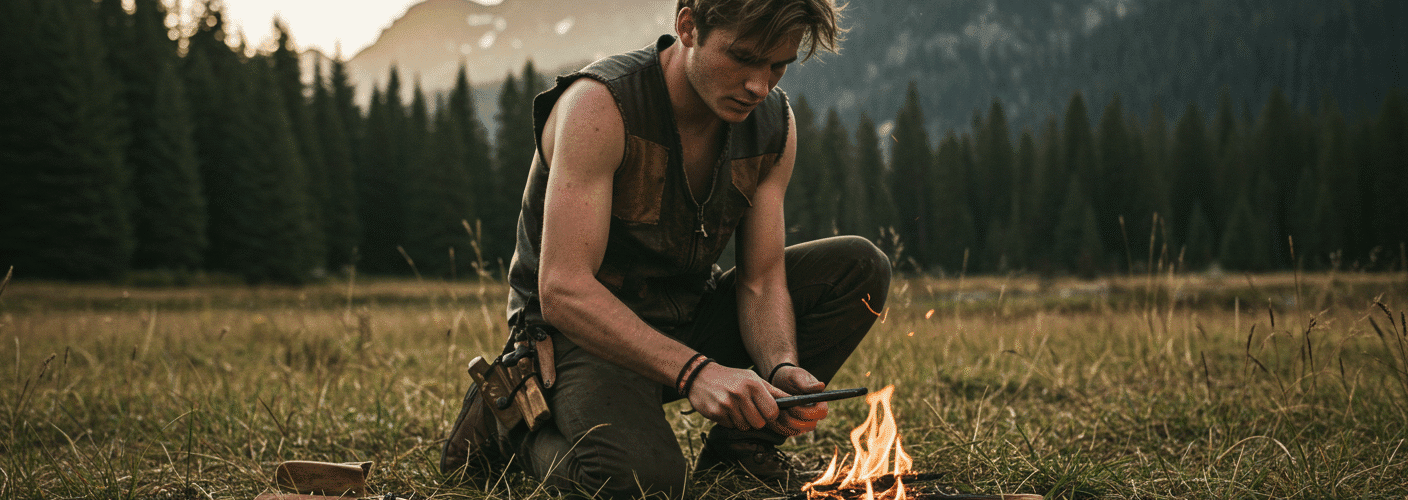
Fire-Making Skills: More Than Just Toasting Marshmallows

Let’s be honest: nothing beats sitting around a blazing fire after a long day outside. Fire isn’t just for roasting marshmallows; it’s also important for preparing food and keeping warm. So, how do we get this wonderful thing going?
Before you try to start a fire, gather some dry tinder, like grass or bark, and some kindling, like small twigs. Then, try different ways to start the fire, including rubbing sticks together or carrying waterproof matches or lighters as backups.
When the fire is going, remember to keep safety in mind. Whenever possible, keep the flames confined in rocks or fire pits and make sure there is enough air flow when cooking. Honestly, there’s nothing like the sensation of finally getting that bonfire starting after what seems like an eternity of fighting with obstinate kindling and matches that won’t light. But before you start cooking marshmallows and pretending to be an outdoor chef, let’s talk about how to keep everything safe and sound.
First of all, it’s very important to set up a safe place for your fire. You wouldn’t want your nice campfire to turn into a wild bonfire that could draw the attention of nearby animals or, even worse, start a forest fire! If you can get your hands on any pebbles or stones, put them around your fire area to make a barrier. This simple action not only keeps the flames in check, but it also protects against any sparks that could try to get out. It’s like giving your fire a small castle!
If you’re at a camping area with a fire pit, use it now! These pits are made to burn safely and frequently have features that help with airflow while keeping everything nice and tidy. Plus, they usually have some nice seating options nearby, which is wonderful for sharing stories when the sun goes down.
Let’s talk about ventilation now that we’re on the subject of airflow. It’s quite crucial while cooking over an open flame. If you’re grilling or boiling water for coffee (because you need caffeine), make sure there’s adequate space around your cooking area for the smoke and heat to escape. A room with good air flow keeps smoke from building up, which can make even the best food taste like burnt rubber—yikes!
To be fair, I’ve had my share of smokey disasters where I thought I was channeling my inner Gordon Ramsay but ended up making more of a mess than a meal. Believe me, no one wants to breathe in smoke while attempting to eat their perfectly roasted hot dog. So, whether you’re cooking directly over the flames or on a grill grate, make sure there’s enough space for the smoke to escape.
And don’t forget to wear safety gear! When dealing with open flames, it’s always a good idea to have a pail of water or sand close by. It can seem like you’re being too careful, but things can get out of hand very fast if an ember emerges out of nowhere or if the wind decides to mess with your well confined fire. Also, having this on hand can make you feel better so you can enjoy yourself instead of stressing about what could go wrong.
Finally, when you’re done cooking and it’s time to put out that beautiful fire (queue the sad music), do it in a safe way! Put out the fire completely with water until all the embers are cold to the touch. No one wants their campground to look like “The Great Fire Escape.” Using sticks to stir the ashes can assist make sure everything is completely out because there may be hidden hotspots below the surface that could start a fire at the worst possible time.
In short, you should celebrate when you make that ideal campfire, but never at the cost of safety! Not only does keeping fires confined in rocks or designated fire pits protect nature, but it also makes everyone’s time outside better by lowering the risks that come with open fires. So go out there and make those memories without worrying about getting hurt in a fire!
Conclusion: Embracing Adventure Safely
Mastering outdoor survival skills may seem overwhelming initially—but trust me; it gets easier once practiced regularly! Each skill learned brings confidence while adventuring outdoors whether hiking through forests or camping under starry skies.
So grab some friends—or maybe go solo—and embrace those challenges head-on knowing these skills could come handy someday…even if only impressing fellow campers during s’mores time!
Frequently Asked Questions
What are the most important survival skills to learn first?
The top priorities in any outdoor survival situation are shelter, water, fire, and food. Learning to build a basic shelter, find and purify water, start a fire safely, and identify edible plants or simple trapping methods will dramatically increase your chances of staying safe and comfortable in the wilderness.
How do I build a simple shelter in the wild?
A lean-to shelter is one of the easiest and most effective to build. Use long branches to create a slanted frame, lean them against a log or fallen tree, and cover with smaller sticks, leaves, and pine needles for insulation. Always choose high ground and add debris inside for warmth and comfort.
What is the safest way to find water outdoors?
Look for flowing water like streams or rivers and avoid stagnant puddles. Always purify water before drinking by boiling it, using a filtration straw, or crafting a solar still if necessary. You can also follow animal tracks or collect rainwater as reliable sources.
What foods can I safely forage in the wilderness?
Common safe wild foods include dandelion greens, clover, wild berries like blackberries and blueberries, nuts, and some mushrooms if you’re trained to identify them correctly. Always confirm plant identity—eating unknown plants can be dangerous. When in doubt, don’t eat it.
Do I really need a compass and map if I have a GPS?
Yes! Technology can fail—batteries die, signals disappear, and phones break. Knowing how to read a topographic map and use a compass ensures you can always find your way. Taking bearings and using landmarks are essential navigation skills every outdoor enthusiast should practice.
What’s the easiest way to start a fire in the wild?
Gather dry tinder like bark, grass, and leaves, and add small twigs as kindling. Use waterproof matches, a lighter, or a fire starter if you have them. In a pinch, friction-based methods like bow drills can work. Always build your fire in a controlled space and keep water nearby for safety.
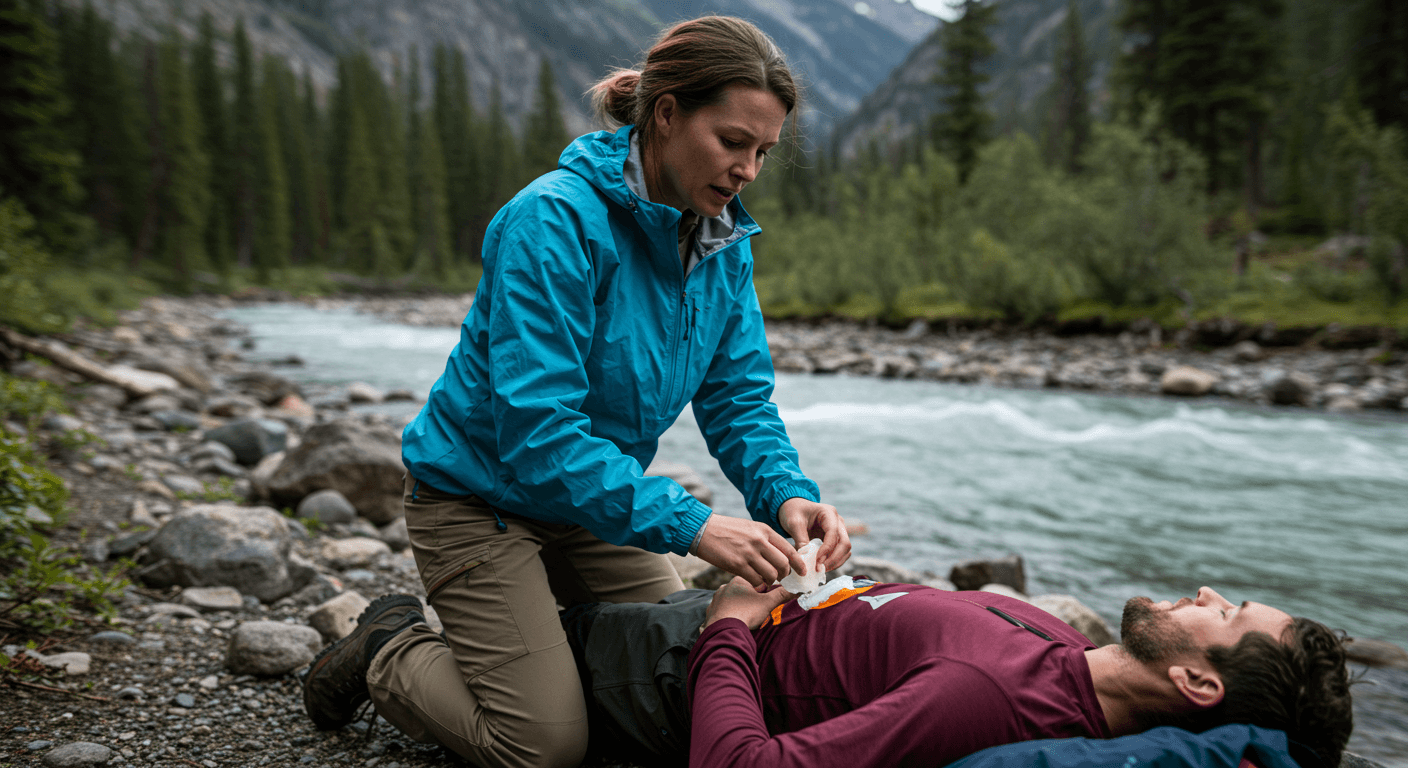
How do I stay calm in a survival situation?
Focus on priorities and break tasks down into small steps—shelter, water, fire, food. Take deep breaths and stay positive. Panic wastes energy and clouds judgment. Remember: survival is just problem-solving one step at a time. Confidence grows with practice and preparation.
Suggested Resources
Outdoor Survival Skills
https://www.outdoorsurvivalskills.com
The Ultimate Guide to Wilderness Survival
https://www.wilderness-survival.net
How To Start Camping
https://www.campingworld.com/how-to-start-camping

Kevin Collier is a seasoned outdoor enthusiast and writer for Trekbug.com, specializing in outdoor adventures, survival strategies, and prepping insights. With a deep love for nature and a commitment to self-sufficiency, Kevin empowers readers to embrace the wilderness confidently. He shares valuable tips, practical techniques, and inspiring stories, helping both novice and experienced adventurers develop essential skills for surviving and thriving in the great outdoors.


